Create editor friendly Sitecore XC properties – A step by step guide to extend editability in an easy way
This time I would like to share some insights in how easy it can be to extend OOTB editability features of Sitecore XC for specific customer requirements. Lately I was faced the situation where the
This time I would like to share some insights in how easy it can be to extend OOTB editability features of Sitecore XC for specific customer requirements.
Lately I was faced the situation where the customer wanted to have some new feature for the website. The feature was, that they just wanted to add some more additional images to products. Of course sellable item entities already have an images field, where editors are able to add product images. The only difference now was, that these additional images are no direct product images, but certification or seal images. Therefore it would not make much sense to add them to the same field than real product images and later on somehow split them again for displaying them differently on the website. So the task was clear. We needed a new field, so that editor can add additional images to sellable items. And of course there are duzend of different approaches, of how we could now add this new field to Sitecore XC. Within this blog post I would like to show you two major approaches compared to each others to outline both pros and cons of the respective approaches. And hopefully you will also learn some new cool features of Sitecore XC you might use in some of your own projects in the future.
Basics
Let’s start with the basic steps to extend any kind of entity with a new editable component.
- Create a new Component to hold the new properties
- Create a View Block to display that component and the properties
- Create an EnsureAction or PopuleAction Block (Depending on your naming preference) to add edit buttons to your component
- Create a FormEdit Block to display modal dialog to edit component properties
- Create a DoAction Block to apply the new values of the properties added in the FormEdit dialog
So now, that we again know, how new properties are added and made editable in general, let’s have a look at the specific requirement to add new kind of product seal images. I will showcase two different approaches of doing that, of course both based on the same general approach from above.
Simple single line input field
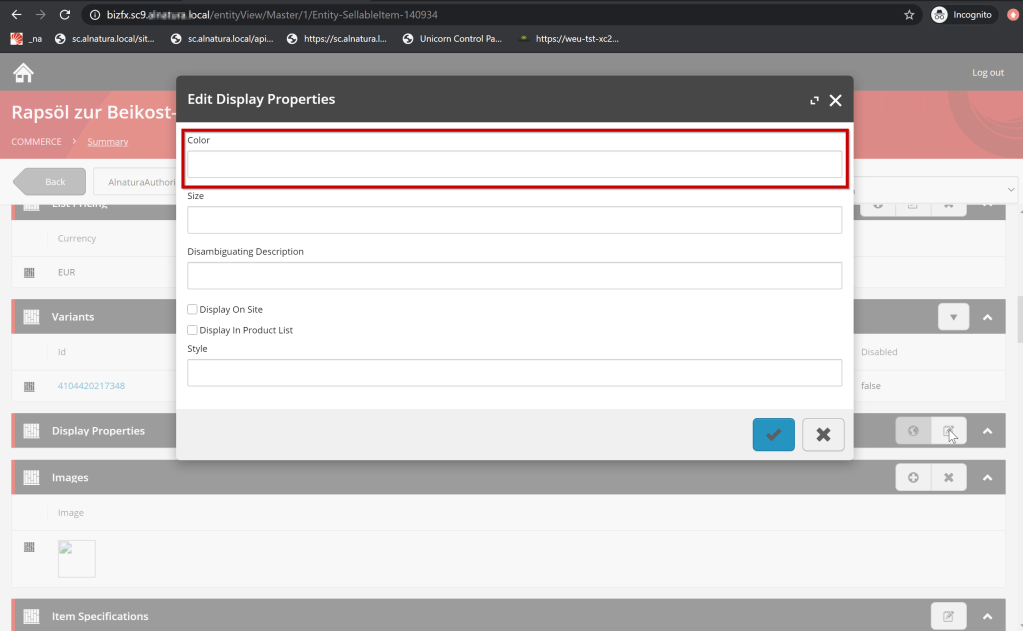
Such an approach would basically mean, that an editor click just gets a very plain single line input field within the modal dialog similar to the Edit Properties modal dialog from OOTB component, like you can see below.
Of course respectively, it also means, that
- the editor to first grab somehow the item ID of the media item from Sitecore XP and paste it here in the modal Dialog (In case of a list of images, of course somehow pipe-separated)
- there is no type of validation to ensure the editor added the item ID correctly or that the item ID belongs to the correct media item.
- the validation has to be done in Sitecore XP afterwards
- that this plain item ID is added to the component
- that this item ID is displayed to the editor again, when having a look at the entity component
So, what would such an approach mean, when considering fulfilling our customer requirements
- PRO — CONTRA
- Very easy to implement — No validation of input
- Very fast to implement — No support to add a list of something (In our case item IDs)
- Very cheap in terms of cost — Display of plain item ID in View Block
- Need to write some kind of validation in Sitecore XP bevor using data
Custom multi-step modal dialog with integrated XP media search
So now, let’s have a look at another, maybe smarter approach. Such an approach we of course already know from standard images field.
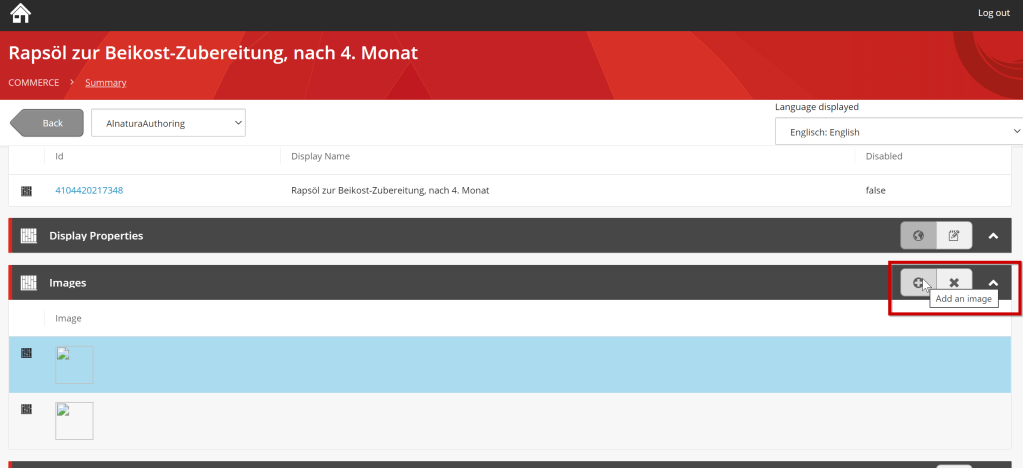
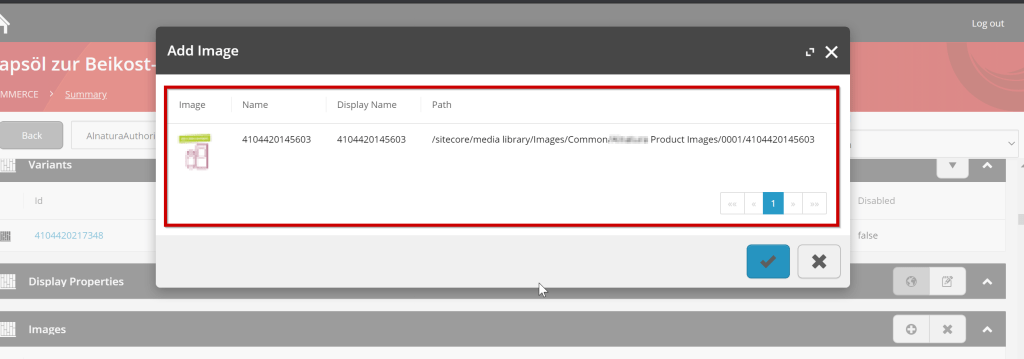
- Click Add Images
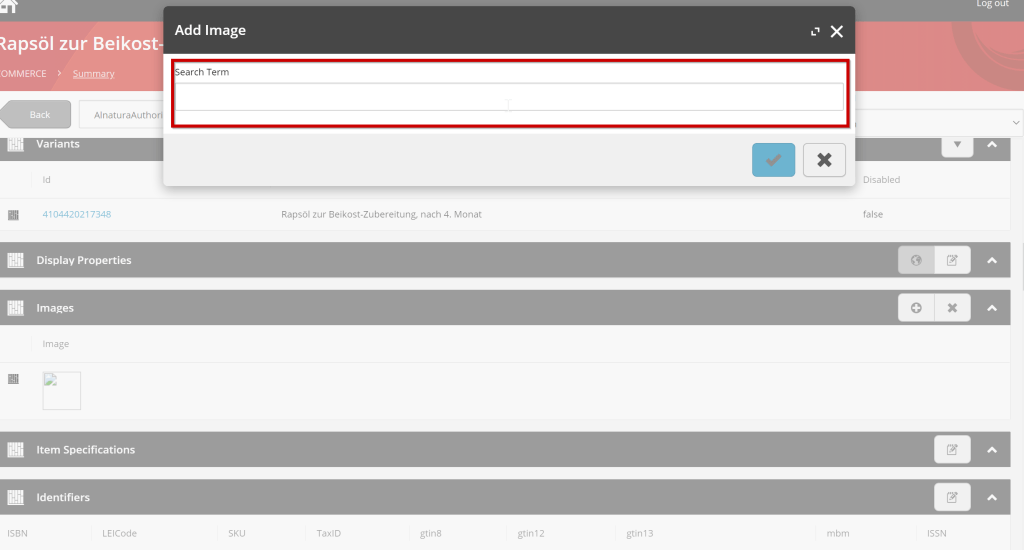
- Enter a search term
- Pick a media item from result list
- Media item is added to the images list and thumbnail is display (In my local instance for some reason not 😉 )
- PRO — CONTRA
- Editor friendly search capability — More complex to implement
- Preview of target media item via thumbnail, name, path etc. while picking media — Not totally clear how to implement such a piece of functionality (before the blog post ;-))
- Integrated validation to be sure only existing and valid item IDs are added — Therefore could be quiet expensive in terms of cost
- Preview of target media item, in View Block
So if you compare these two different approaches it is quiet clear, that we always would like to implement the second approach, because the editors will be much happier with that. The only limitation factor is, that it possibly costs much more. Therefore most of the customers will most likely fallback to the easier approach to save some money. But editors as well as XP developer, who have to work with the input of these fields, will not be very happy, when using it.
And exactly that was the case in my situation. And because I did not want, that the main decision factor is money, I decided to find out, how the second approach can be easily adapted for our use case, to save some time in customer implementation and therefore save some money.
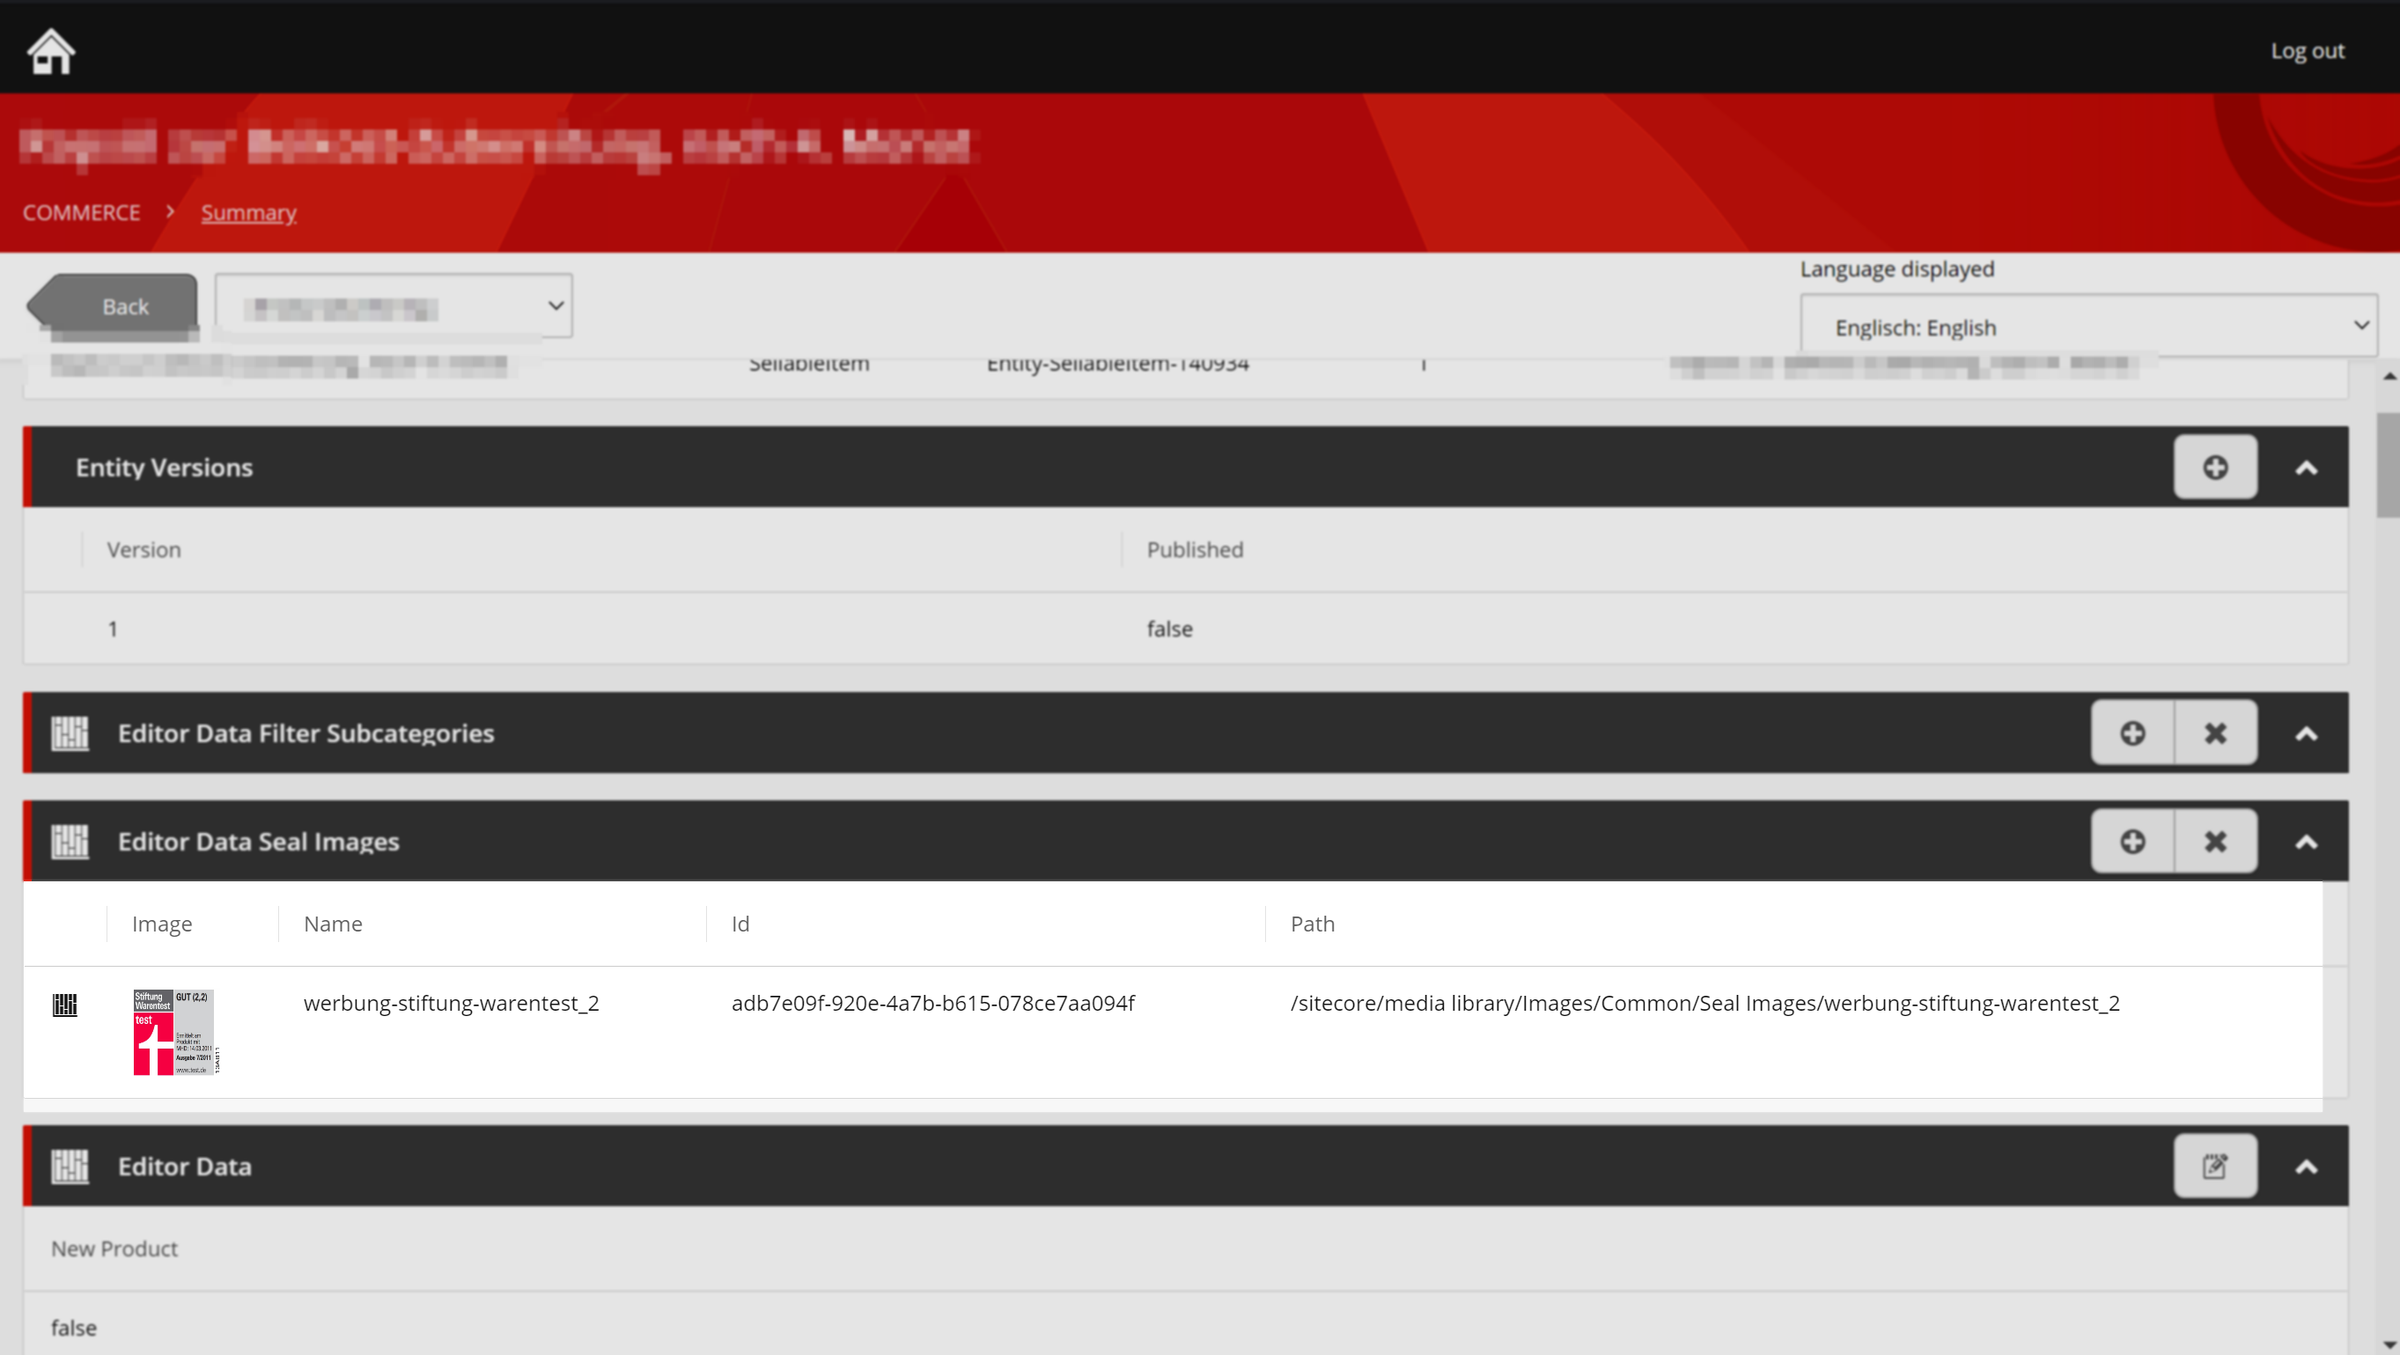
The result of that investigation now was the newly created custom “Seal Images” component property, which had a fully working multi-step, media search dialog.
How does it work?
Let’s have a look, what is needed to have
- a multi-step dialog
- with an item search
- an item picker
- and a possibility to preview media items directly
Note: Of course parts of the code is based on Sitecore standard implementation and existing blocks. I decided to reuse / re-implement them in this blog post to show all steps of the process.
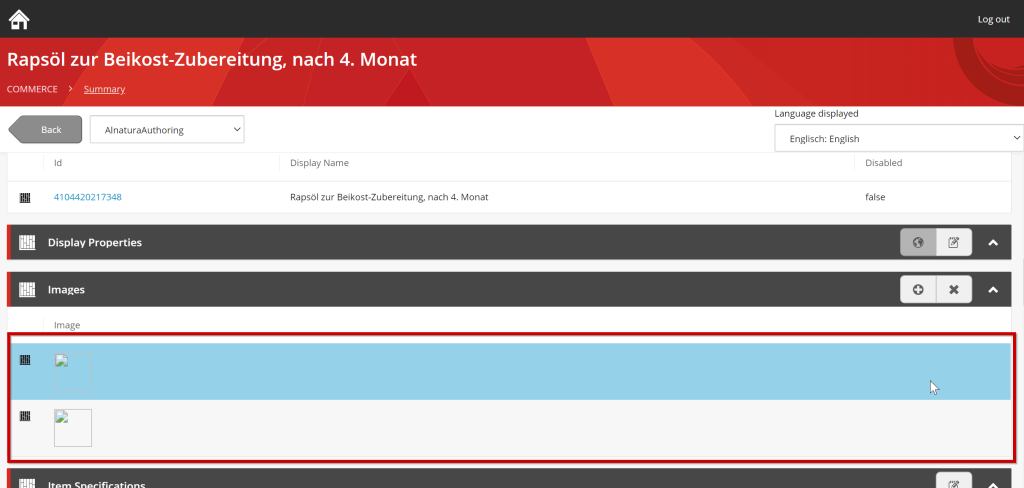
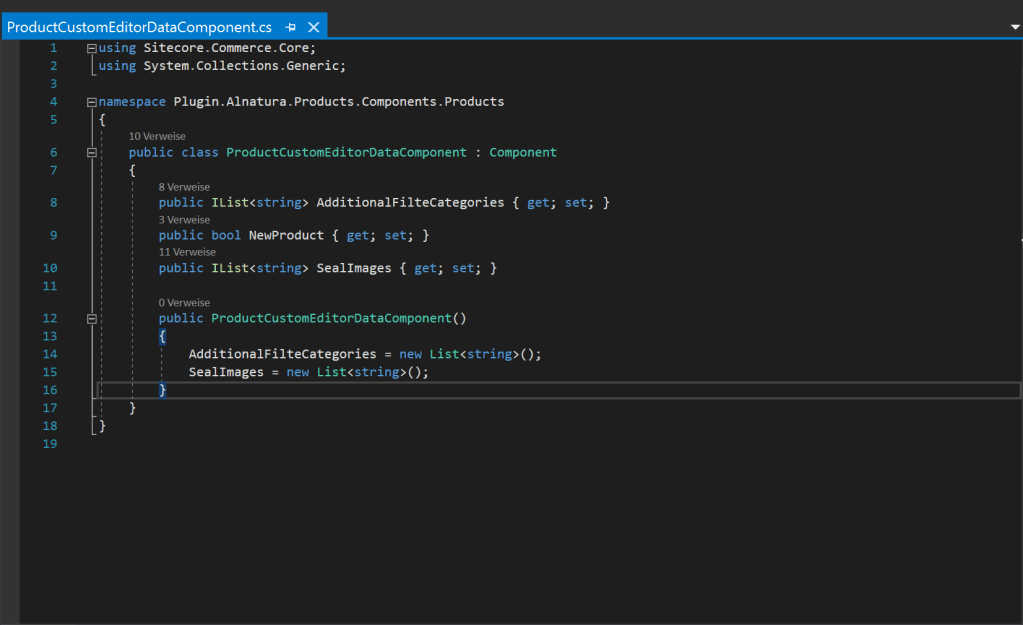
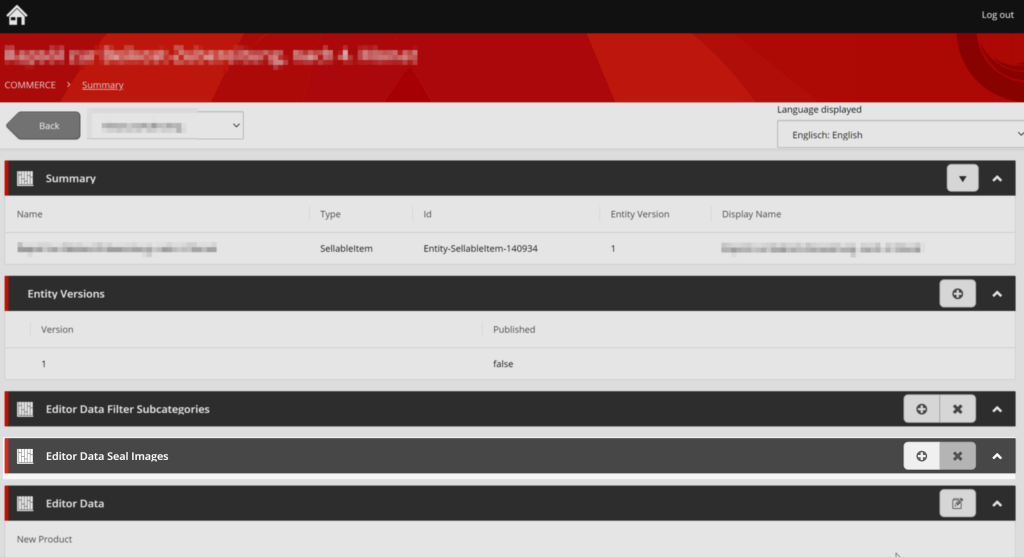
We start with the very first piece of code, the property / component. In this scenario, I decided to put the “Seal Images” list property into an existing component, as you can see below. Of course it is also possible to create a new component for that.
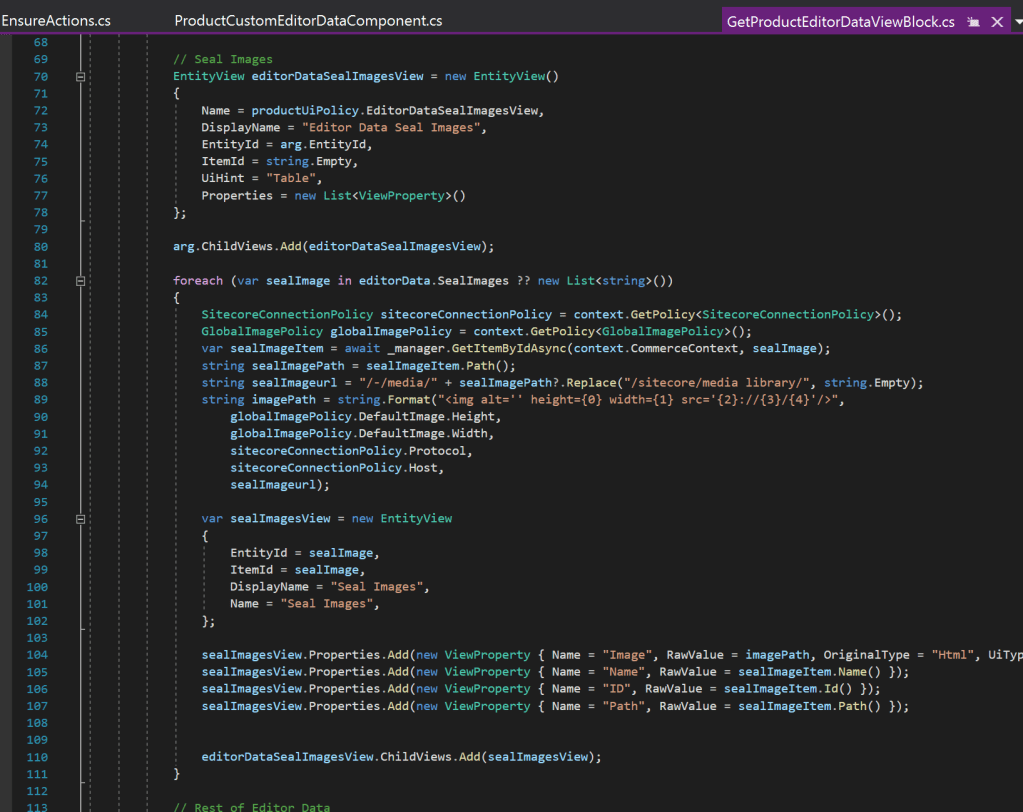
The next thing is now, the possibility to display the media items, once we were able to add them properly to the property. Let’s assume, we already have added some media items to the list of “Seal Images”, we know, that we have a list of item IDs as base. a simple approach would be to just display the item IDs directly to the editor. But of course, that is not very editor friendly. In case it should be more editor friendly, we should display a thumbnail of the media item, maybe the name, display name or path. To do so, Sitecore XC gave us some board tools, we will use now. With the SitecoreConnectionManager we are able to take an item ID and grab all item related data directly from XP, to have them available in XC. As you can see in the screen below, we take the item ID, use the manager to grab additional data and then prepare these data to be properly displayed to the editor. For the thumbnail we need some special knowledge about and treatment for media items. As you can see, we grab some basic Sitecore XP data via policy together with some basic image policy data and build a html raw output to display the image of the media item. With these information it will be then quiet easy for and editor to maintain seal images.
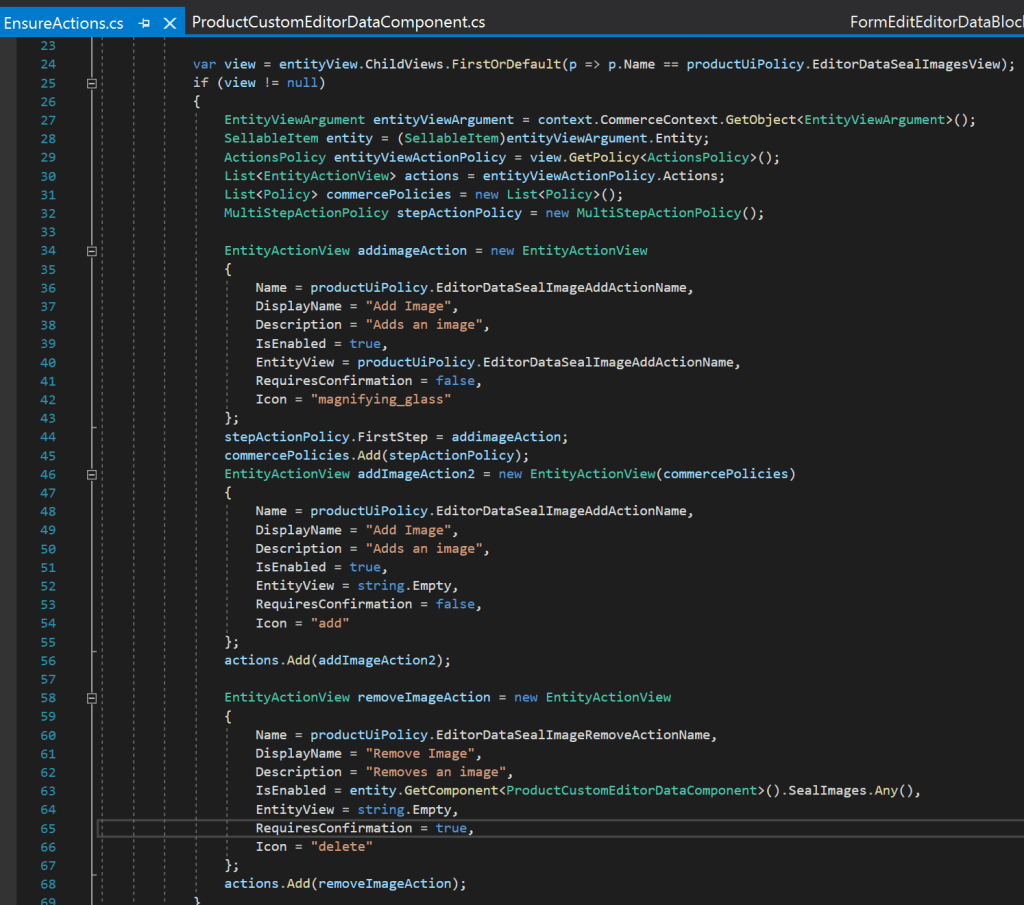
Let’s now take care of how to add new media items properly to that property. To do so, we can easily add new action policies to the proper entity view child. But we have to do something very special this time. Because we would like to create a multi-step dialog, we do not just add the action policy to the child view, but first create a MultiStepActionPolicy, add the “Add Image” action policy there as first step and use this multi step action policy as a base, when creating the standard action policy, as we know it.
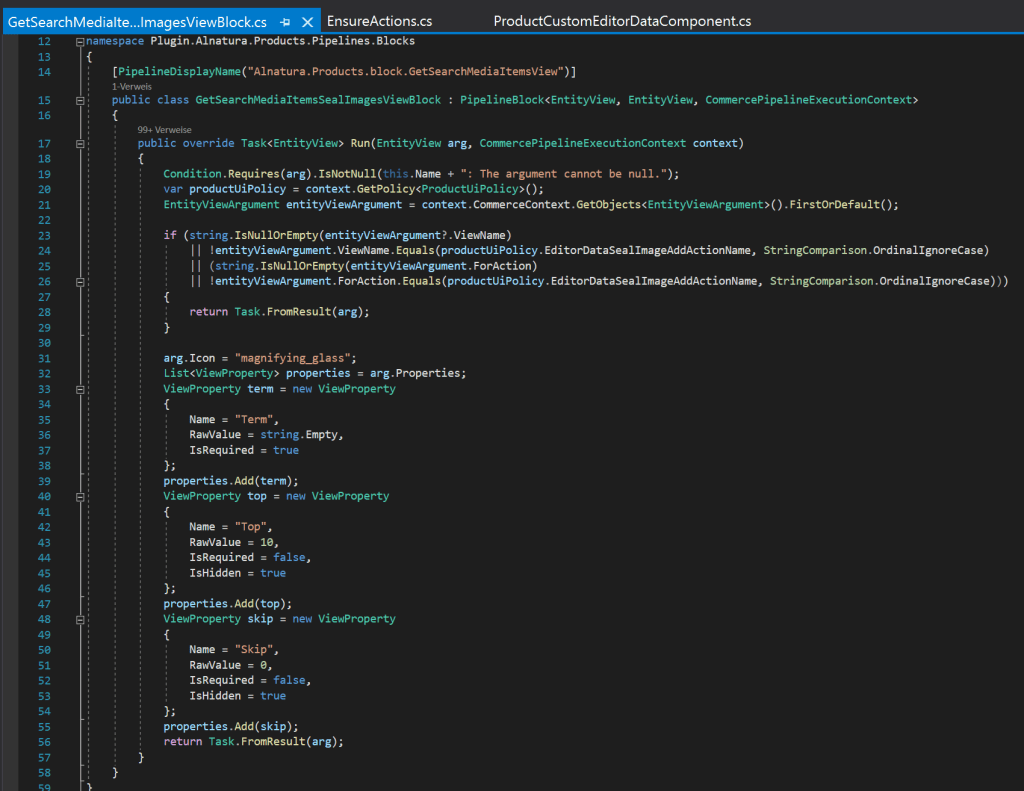
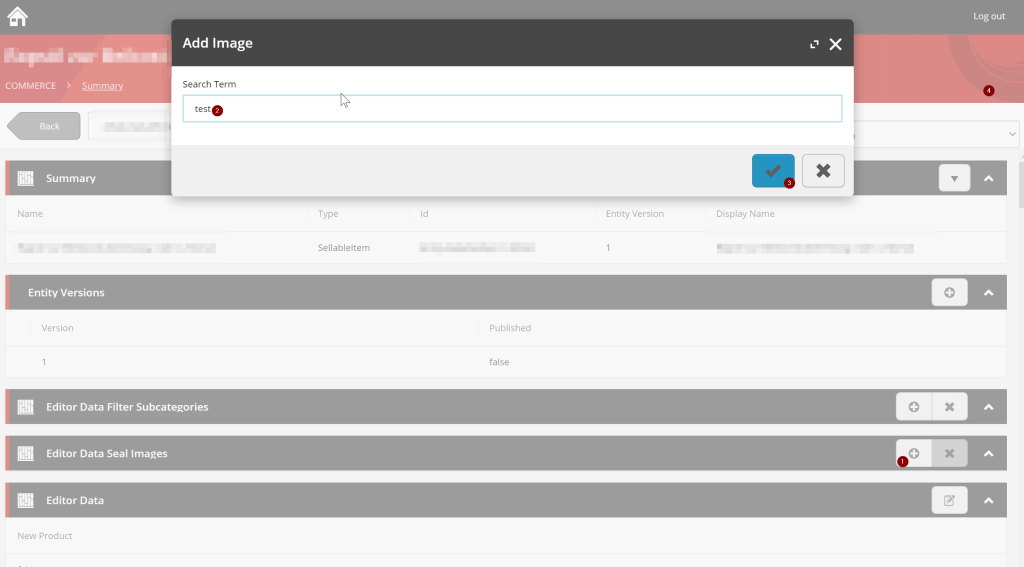
Once we did that, the next step of course is to create the edit view block (Modal dialog), or better the first step of the edit view block. The code below show, how to provide the editor a simple input field, which will be internally used for media search. And yes, for now it’s nothing more.
Let’s assume an editor entered that dialog and entered a search term and clicked (✔). What’s now? Now we have to create an DoAction Block, which reacts on the specific input and executes a media search internally. The code below shows that code.
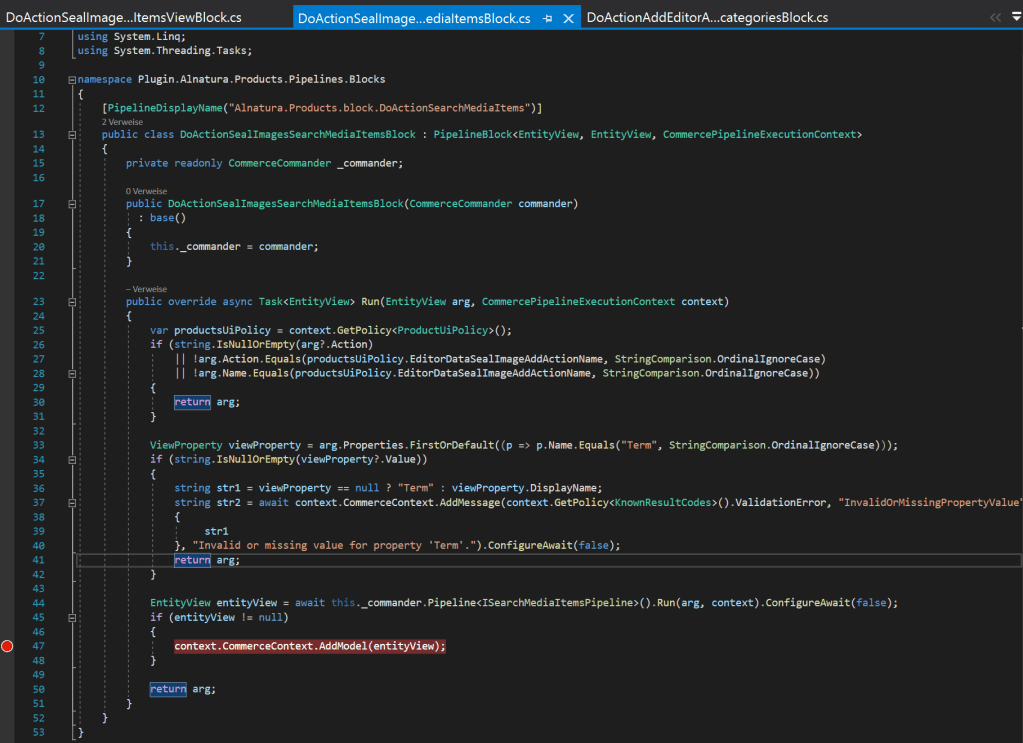
As you can see, the term is extracted from the dialog and in the end just a media search via ISearchMediaItemsPipeline is executed and the results are pushed back via entity view and the pipeline execution continues. This is important, because within the same pipeline we have to create another block, which is executed afterwards, and which is able to take the media search entity view result and process it. The code of that block you can see below.
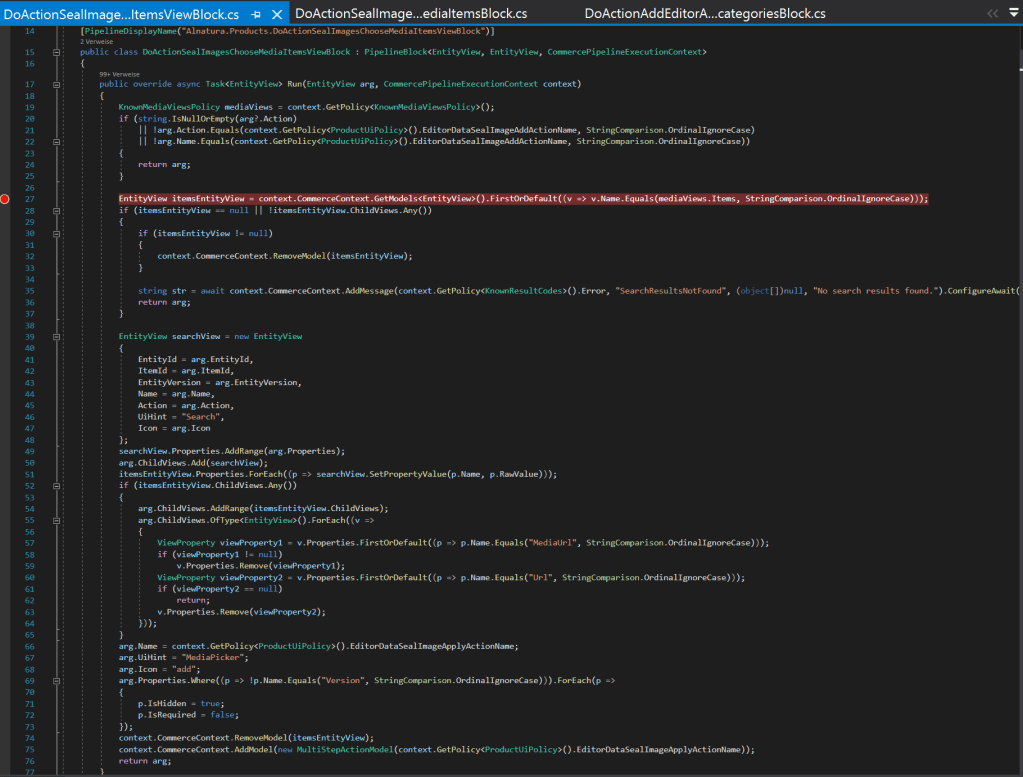
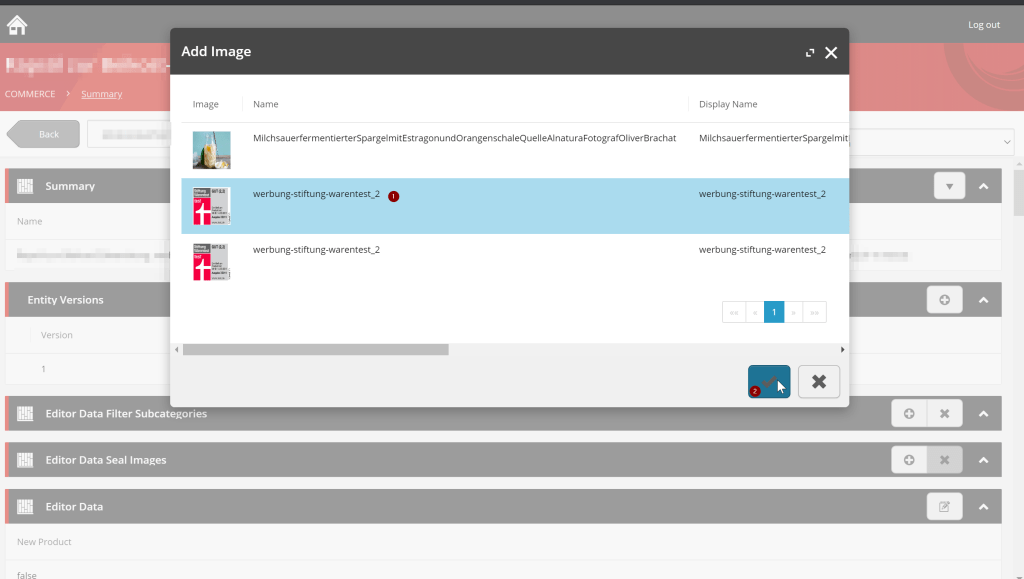
You can see, that after some very specific validation, that previously everything worked well, you can see, that the results from the search are grabbed, processed and pushed back to the next result entity view. The editor gets a list of all results, matching the search term and because the view is of type media picker, the editor is also able to choose one result and pick it to be added as, in our case, seal image. There is, beside the processing and result view assembling, one special thing at the end of the block. As you can see, we have to inject the next step of our multi-step dialog in form of the action name of the next submit action click. Once we push back our entity view result, it will be displayed again to the editor. In this case the editor can choose one of the results and clicks (✔) again to submit his choice. Now, if we would not have created a multi-step form previously and would not have updated it with the action name of the next step, we would have a serious issue grabbing the next click, cause it would be triggered with the exact same action name as bevor. But with the multi-step dialog, we were able to change the action triggered for the second dialog.
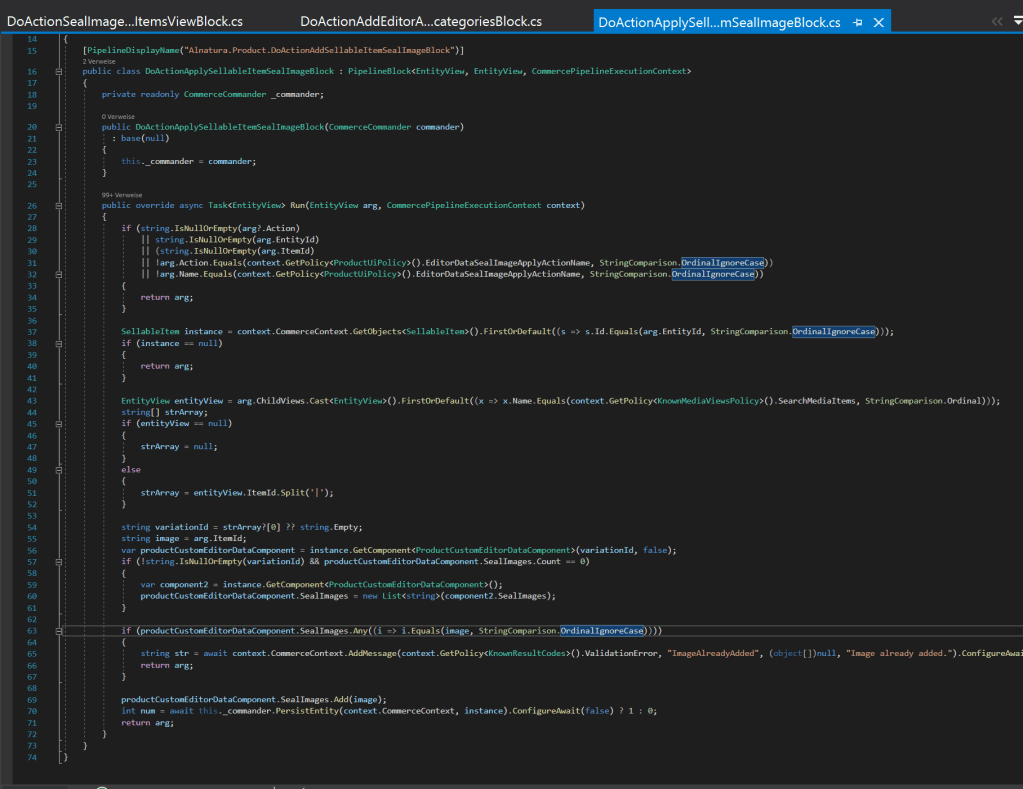
So after we now have chosen an image and submitted the form again with the new action name, of course we have to create another DoAction Block, which is responsible for grabbing the chosen result and put it finally into our newly created “Seal Images” list property, as you can see in the code example below.
I guess you would like to see everything in action now. So let’s do it.
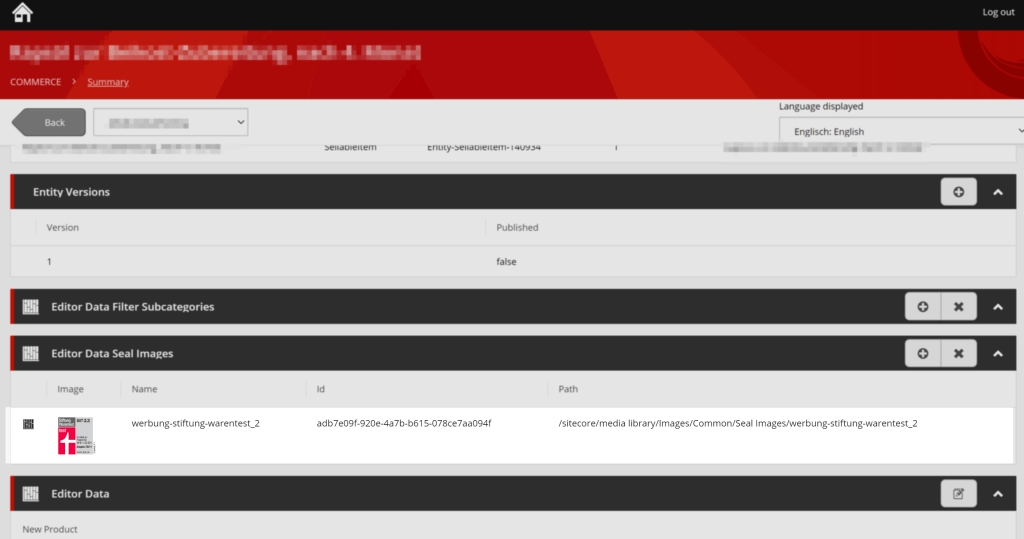
You might also see, some nice side effect, of implementing all blocks own my own. Also the image is displayed correctly in my custom field as it was broken in the standard images field ^^.
Conclusion
Within this blog post I tried to show case a common scenario every Sitecore XC developer will be faced to earlier or later. At some point you have to see customer requirements and match them to Sitecore XC capabilities and developers knowledge and abilities to find a proper solution. I tried to show, that with some deeper knowledge of Sitecore XC mechanisms and features we are able to deliver more valuable feature for the editors and customers for the same costs, than the simple, clumsy solution.
- architecture
- dotnet
- sitecore-commerce
- sitecore-platform