Vercel v0 – From Snippets to Sync: Choosing the Right v0 Workflow
As my AI supported workflow learning continues, especially with v0, I would love to write down some more learnings. After doing my very first baby-steps into a new world, it was definitely time to do
As my AI supported workflow learning continues, especially with v0, I would love to write down some more learnings. After doing my very first baby-steps into a new world, it was definitely time to do more. So what are you going to read about this time? This time I experimented a bit with the different Workflows v0 offers. And with that I mean the following.
When you interact with v0 and get all the fancy results, designs and all the code, you might ask yourself:
How do I get the code? What kind of workflows exist and how can I best use them?
Totally valid questions as there is more than one way to integrate v0 into your day to day work or better into your development workflow. In this post I will deep dive into three different ways all serving different purposes with its own pros and cons. Without wasting any further words, let us directly jump into those workflows.
Copy & Paste Code Snippets
I would say this is the simplest and quickest way to get the code out of v0. Initially I did exactly this, when I did my first steps. I talked about the Page Translation Marketplace Plugin for Sitecore Page Builder and used v0 basically to use an existing component with a rough design idea to make it prettier. Because I already had an up and running app with various components and pieces of logic and my target was to just refactor the design of my app a bit, this workflow worked pretty well for me. But what does this mean in essence.
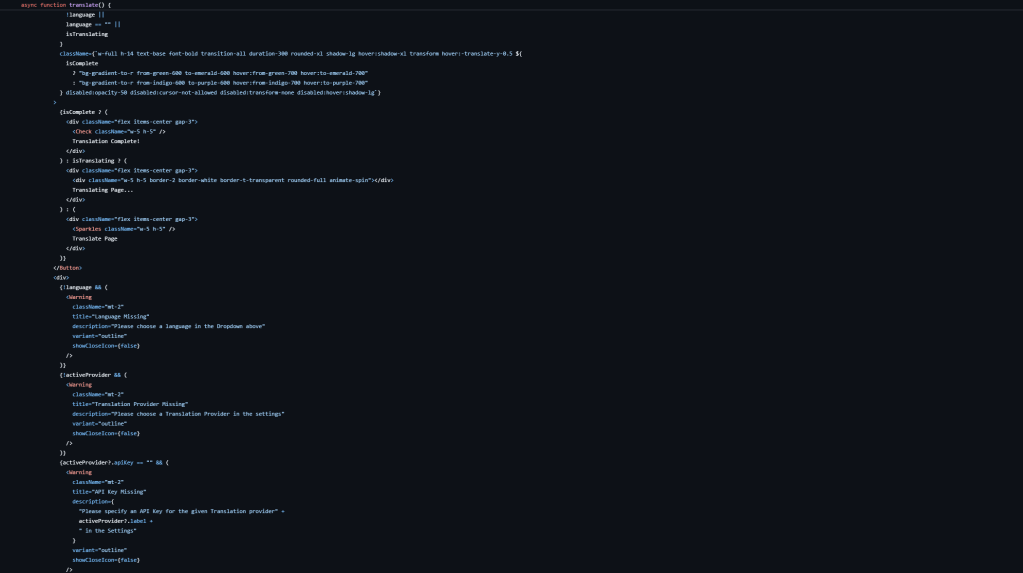
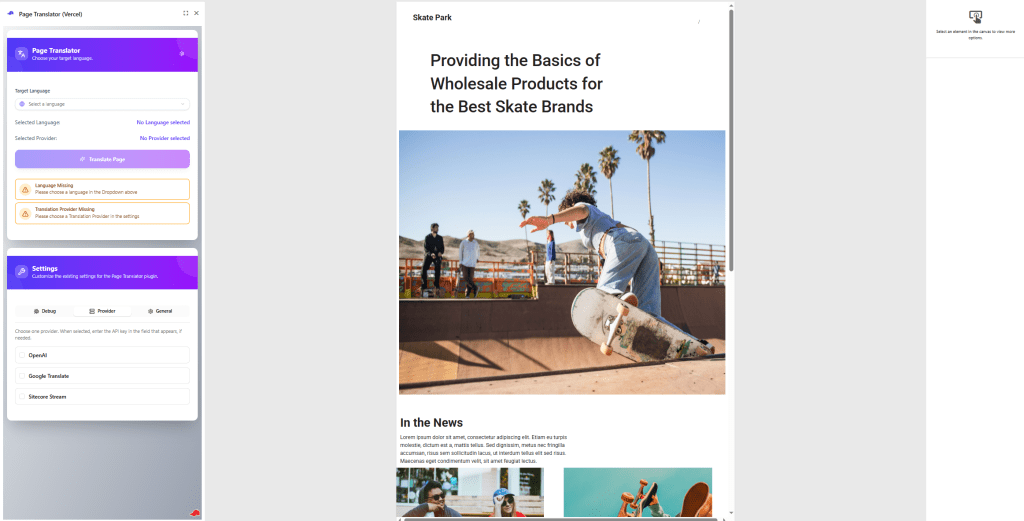
I will take the example of the warning message as it best demonstrates the strength and purpose of this workflow. You might remember this chat and screen.
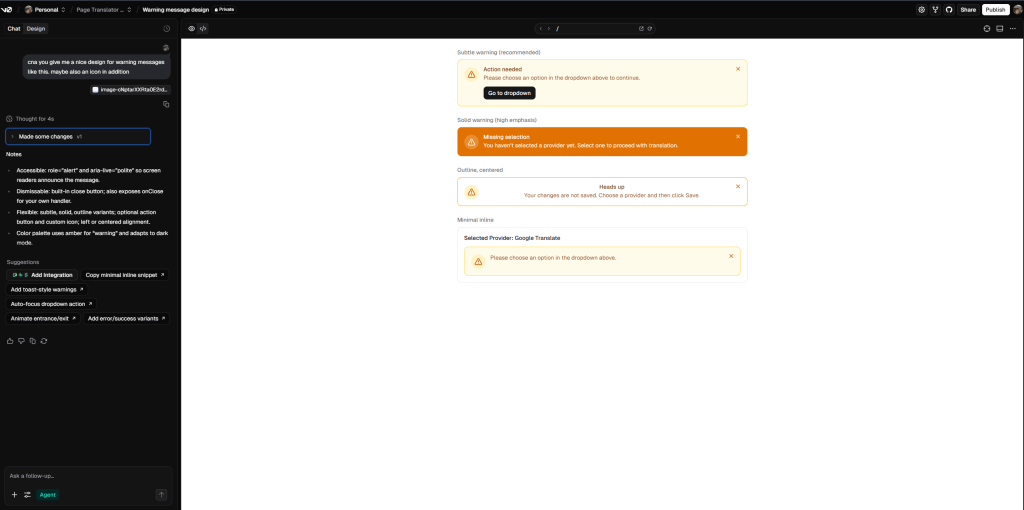
The task was to take an existing warning (totally un-styled) and offer some ideas, how this could be styles. The result was code for such a warning component with different variations.
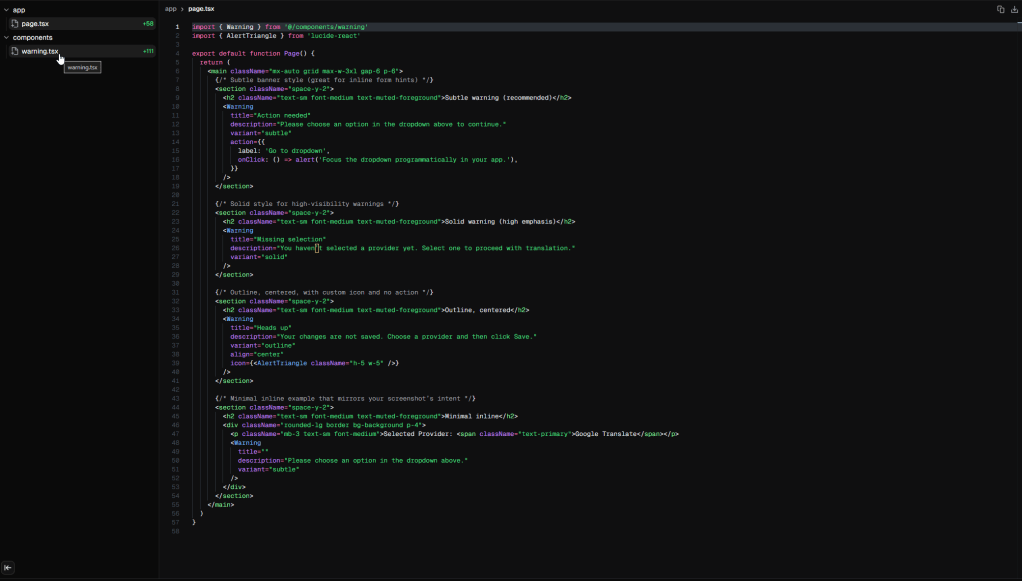
When looking at the code you also see a very atomic structure, meaning I just have the warning.tsx and a page, where those variations of the warning components were used. So what did I do?
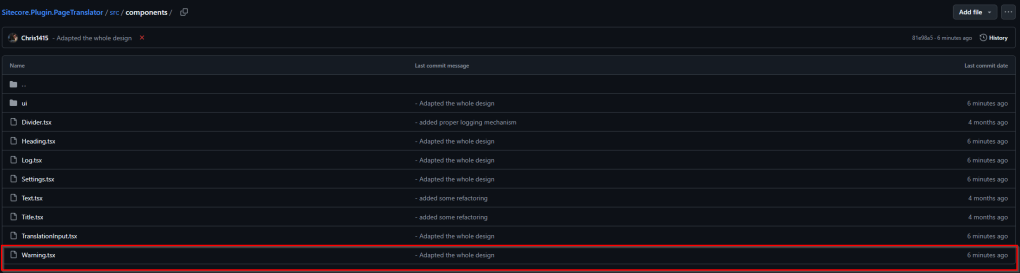
I just copy & pasted the warning.tsx into my solution and started using it exactly at the place, where I wanted a warning message to appear.
Also the result was exactly what I would have expected after doing this. Of course design is always a very subjective thing, but as mentioned last time, compared to my initial design I love this one pretty much.
And all of that was done in less than 5 minutes. From prompt, copy & paste, adding on a page, local testing to Vercel deployment so that it is visible in Sitecore Page Builder was a task of a few minutes.
And this is exactly the beauty of this simple approach. When I just need v0 to quickly design a component or a sub area of an existing app I would always go this way.
Install via shadcn registry
Imagine you are building a whole app and not just a few components. The copy and paste flow would be pretty time consuming and inefficient. Let us explore another option how to get the code from v0. At the top right you get additional options. By clicking on those you basically get two more options.
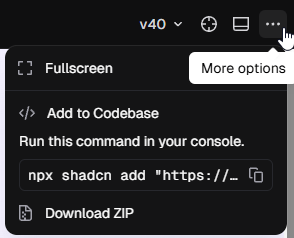
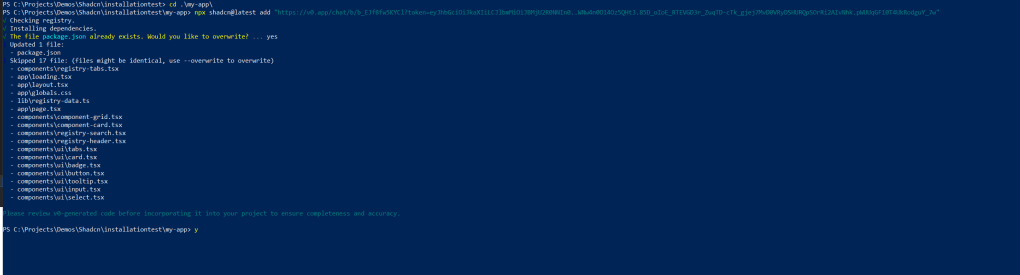
Let us start with option one. There is a nice way to easily get all the needed code, which was generated during the chat. You can copy & paste the command, which is visible above. You can see that it is based on shadcn and its functionality to create and distribute custom registries. In essence those registries hold information about files / components etc. which should be installed when executing a specific command.
Read more here https://ui.shadcn.com/docs/registry
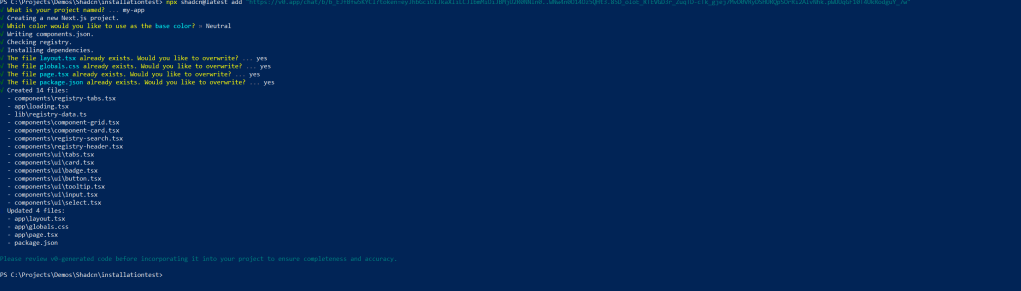
So by following this approach you can easily create a new “blank” app together with all the needed files installed on top. You have limited capabilities which parts should be overwritten or not. See below an example installation of one of my recent v0 chats.
In case you already have an existing app you can easily navigate to its root folder and execute the command. This way only the new components, which are included in the registry / package are installed.
All this just takes seconds and you have everything up and running locally. You can also update your local solution by executing installation commands from newer chats. But keep in mind, you only have limited possibilities, what exactly gets overwritten. So when you already worked locally and reinstall afterwards, your changes might get overwritten with the latest v0 chat.
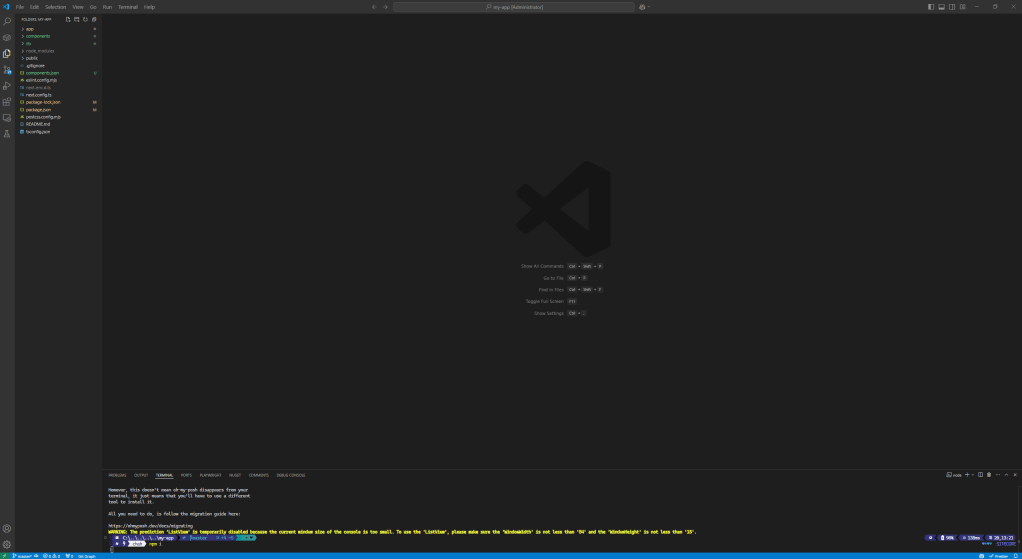
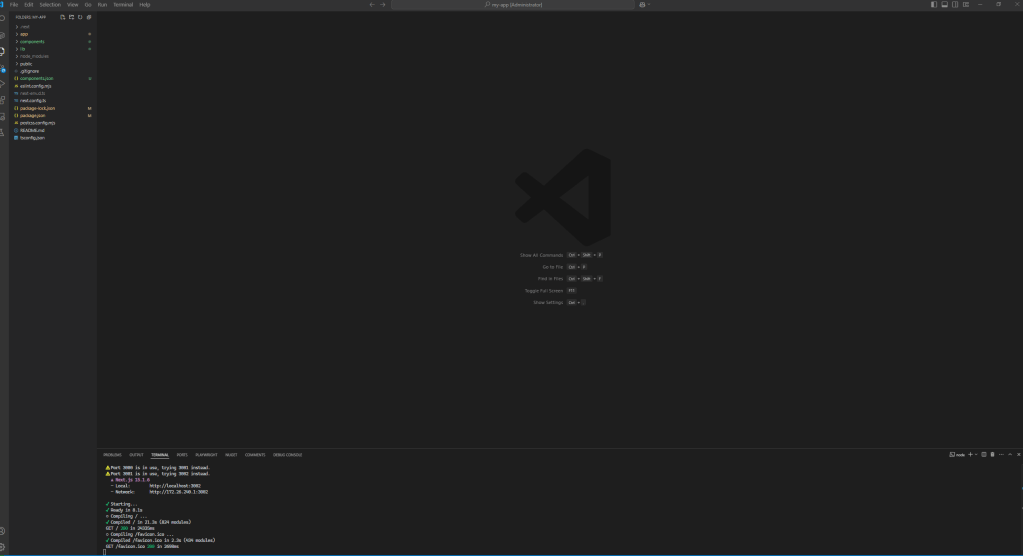
In the screens above you can see the smooth dependency installation together with spinning up the app locally and e voila all is there without any issues exactly how the v0 preview showed it to me.
This is really helpful in some cases, when you want to start from scratch and just put the v0 generated stuff on top. Also this is helpful when you want to start the app development in v0 with a proper design approach and core logic, and then continue your journey as usual in the code editor or way of choice. Obviously after you installed everything the link to v0 is cut off as it might end up in a big merge disaster if you continue working in v0 and locally this way.
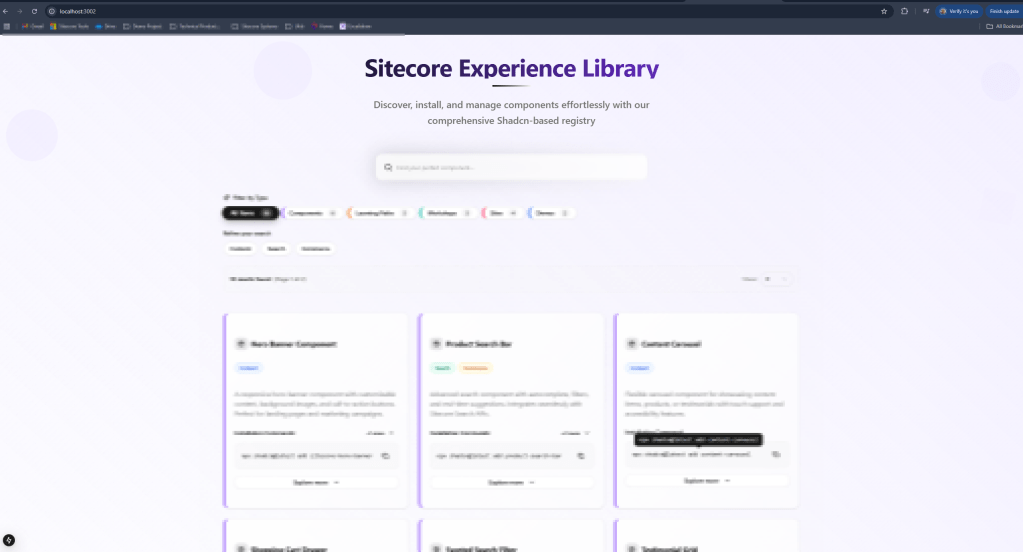
Note: This is a little project I am working on and investigating on how we as Sitecore could leverage latest shadcn custom registry capabilities to offer an enhanced Developer Experience. For now I am heavily experimenting with it and obviously I needed an appealing UI to access the stuff properly. Win-Win situation to use v0 for it as well. Let us keep it like that for the moment. Over the next weeks and months you might here more about this little project here and there ;-).
Download full Package
Now we learned we can get the whole app with one installation command, which is great, but not really useful, when we need to add updates over time as it might overwrite your local changes. Luckily we have another option available. I admit it is a more manual way to get the code, but more manual way means more control, what exactly happens and gets overwritten or kept off.
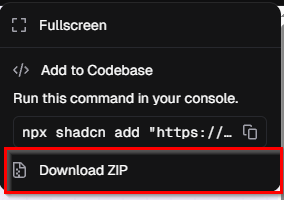
You can easily download a zip package of the whole application based on the latest chat. This way you can either way use exactly this app, copy and paste it in total into an existing app OR cherry pick what you really want to overwrite. Of course this freedom means more effort. So in the end it highly depends on the use case and what you want to achieve if this method makes sense or not. I started using this approach in one of my projects and it worked well so far. But as soon as I tried the shadcn installation way, I switched over to this approach as I did not need to have that much freedom.
Connect directly to GitHub
Last but not least, the direct connection to GitHub. All the previous methods had a manual part within the process. But what if you really want to automate things or need a tight connection between what v0 is doing and what you are doing locally?
Imagine you want to start working in v0, continue locally, going back to v0 etc. When you seek for a constant exchange between v0 and working locally all the previous methods have their issues. The previous methods mostly target towards a flow like this: work in v0 take over the changes and you are done or you just continue locally without pushing those changes back to v0. Of course there are ways to update v0 manually with some changes you did locally, but it is effort and still not tightly in sync anyways. If you end up in a scenario where you constantly switch between v0 and local development, you should definitely have a look at this flow.
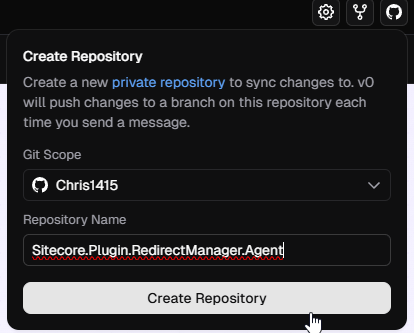
Of course I also tried this approach in one of my newest projects. I started from scratch meaning I let v0 create a repository and let it connect to a branch in that repository. To get started, just click on to the GitHub Icon. This lets you connect to your preferred GitHub account and let you choose a name for the new repository.
Note: Right now, I can only see the option to create a new repository in GitHub Connect. This flow makes perfect sense if you need or want to create a new repository. However, it doesn’t seem applicable when you already have an existing repository that you just want to connect.
It just takes seconds and you can see the new repository including a pretty informative and helpful Readme file explaining, that this repository was created by v0, where to find the chat, the deployed site etc.
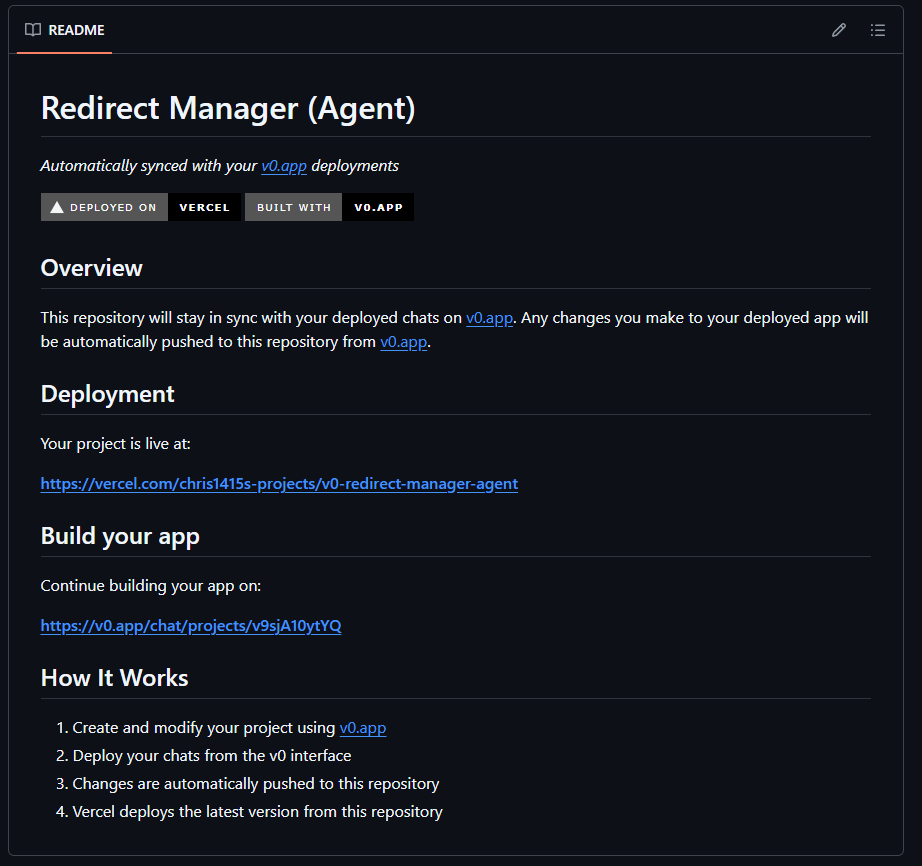
Speaking of deployed site, it also creates a Vercel deployment automatically behind the scenes. So you chat and the preview get also be easily deployed to Vercel with just a click if you want.
Initially it would automatically pull from and push to the connected branch and initially it is connected to the main branch. For me personally I created a new branch and simply called it v0 to indicate that stuff from v0 is added there.
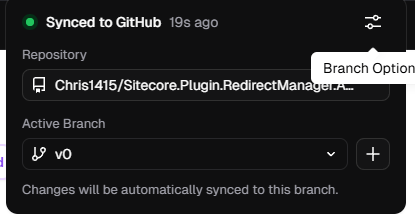
On top of that I also did not want it to automatically pull or push. So I decided to disable those features so I can actively push those buttons, whenever I think it is the right moment to do so.
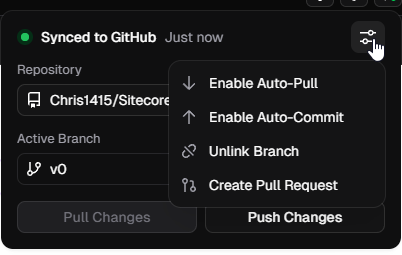
Imagine the case (and I had this) that you try out stuff with multiple prompts and create various versions of your app. Usually this would be directly and immediately pushed to GitHub. But what if you then revert again most of this stuff? The whole commit history would be full of non-relevant commit messages. So my personal flow, and others might see it differently is, that I play around as long as I need changes. And as soon as a task is done I actively push exactly this state to GitHub with a single commit. Usually at that point I also create a PR as I see this as a next stable Milestone. Last I usually do is to create a new fork of my chat to tackle the next tasks. Turned out at least for me that this flow massively increased my productivity with minimal manual effort.
This all lead to the final workflow I am following with this type of GitHub connection. Typically I start a new chat when I need to adapt my app. This new forked chat pulls latest changes from the existing branch, or creates a new working branch. I work with v0 till I am happy with the results. Then I hit the push button to push everything into my repository. I pull locally those latest changes and ensure everything is properly working and make potentially changes. For instance connecting loose ends between designed components and existing backend logic, or similar. You can think of many tasks you want to code on your own on top of this. Once I am also happy with that I push again to the branch. Either way I am happy now and create a PR and merge to main, deploy etc. or I continue to work in v0. If so I just pull latest changes from the branch and continue my work there. This way I get a maximized efficiency creating apps, by still having full control.
I would say working like this let me create an appealing app including customized backend logic for instance logic for Sitecore Marketplace Plugin within minutes, max hours rather than days.
Overview
After trying out all these approaches and collecting my own experiences and learnings I also wanted to give you a more neutral pov. Here is what gen-AI thinks about those approaches. And I would say it pretty much matches my experiences with those approaches.
| Approach | Purpose | ✅ Pros | ❌ Cons | Best Use Case |
|---|---|---|---|---|
| Copy & Paste Code Snippets | Grab a specific UI component or snippet to drop into your existing project | – Fast & simple- Granular control – No project disruption | – Can cause fragmented code – Manual dependency installs- Not scalable for large projects | Quick experiments or adding a single component to a mature project |
| Install via npx shadcn add <v0-link> | Start with your own clean Next.js/Tailwind setup and pull in entire v0-generated components directly | – Super clean setup – Brings in all dependencies automatically– Keeps the shadcn structure – Easy to reproduce/redo- Great long-term maintainability | – Requires an existing Next.js + shadcn project- You don’t get a full project scaffold, only components- Slightly more CLI-driven workflow | When you want to integrate v0 components into a real production repo without copy-paste mess |
| Download Package | Get a complete, ready-to-run project generated by v0 | – Self-contained- Quick bootstrap- Consistency across components | – Overwrites existing projects- Manual merging required – Each new export is a fresh project | Starting a new project from scratch or testing a full demo/prototype |
| Connect to GitHub | Keep generated code in a real repo with version control | – Version control built-in – Team collaboration – Easy deploy to Vercel | – Setup required – Risk of pushing messy code- Overhead for small experiments | When you’re ready to treat the code as production and evolve it with your team |
AI generated overview with objective facts
Conclusion
See this blog post as my next steps on my v0 journey. After I just played around a bit with the chat, prompts and the results I continued to find a good workflow. Turned out there are quite a few possible workflows how someone can work with v0 and integrate this into the tasks or even day to day work. I wanted to understand what these are with pros and cons by simply trying them out. Turns out all of them serve a particular purpose with own pros and cons. Just depends on the use case. Do you need a quick scribble, a PoC, a working Design mock or a whole app? Do you just need it one time or is it a more recurring task to enhance an existing app even further? All this needs to be taken into consideration for choosing your way to work with v0.
- ai
- devex
- frontend
- nextjs
- sitecore-platform
- vercel