XM Cloud – Isn’t there A/B/n Testing also available? And how does THAT work compared to Personalization?
Welcome back to another post about Sitecore XM Cloud. Last time we talked about Embedded Personalization and Analytics and how it actually works down to a coding level. If you didn’t do so far you
Welcome back to another post about Sitecore XM Cloud. Last time we talked about Embedded Personalization and Analytics and how it actually works down to a coding level. If you didn’t do so far you should definitely read that one first https://hachweb.wordpress.com/2025/01/07/xm-cloud-uncover-all-the-secrets-of-embedded-personalization/.
If you read it you are perfectly prepared for this post. This time we have a very close look at how A/B/n testing in XM Cloud works. Again down to a coding level. The good news here is, that you really don’t have to see or learn much more, cause the underlying technique is more or less exactly the same. We just need to have some “special” cases in mind, which make A/B/n Testing special
What is A/B/n Testing?
Cause this chapter should really set the scene and give you very high level information I will just pass them through, cause I think this really fits well into an high level overview of A/B/n testing.
A/B/n testing is an extension of traditional A/B testing in which you compare more than two variations of a webpage, email, or other digital experience at the same time. Instead of testing just Version A against Version B, you might test multiple different variations (A, B, C, D, and so on)—hence the “n” in A/B/n. The goal is to identify the variation that performs the best according to the chosen metric (e.g., click-through rate, conversion rate, sign-ups, or revenue).
Key points about A/B/n testing:
- Multiple Variations: You can test multiple design changes or content variations at once, enabling you to learn more in a single test.
- Traffic Division: Your audience is randomly split among all variations, so each version receives a share of the total traffic.
- Faster Insights: By testing multiple variations concurrently, you can potentially reduce the overall time needed to find a winning version compared to running separate A/B tests sequentially.
- Statistical Rigor: You still need to ensure you gather enough data to reach a statistically valid conclusion for each variation compared to the control (and compared to each other, if relevant).
- Optimization Strategy: A/B/n testing is particularly useful when you have multiple hypotheses for improvement—e.g., different headlines, images, page layouts—and want to see which changes resonate most with users before committing to major design overhauls.
Overall, A/B/n testing is a powerful technique for quickly experimenting with multiple ideas. It helps digital marketers, product managers, and UX designers make data-backed decisions about which version of a page, email, or app feature is most effective at meeting their objectives.
How does it work in XM Cloud?
The more interesting part obviously is, how Sitecore XM Cloud enables marketers to do A/B/n Testing. I have to admit it is a feature, which was released not that long ago, therefore you might not have heard about that or played with that on your own. But I can guarantee you that it is a much foreseeing and powerful extension to the already known personalization capabilities.
Let us start with a short journey through Sitecore how it looks and feels from a Marketers point of view. And again we are using my little demo site with some “community” based Sitecore content.
Let’S assume you are using Page Builder (As you should always do ;-)) you can simply go to a page and click on any component. When doing so you will notice a new icon.
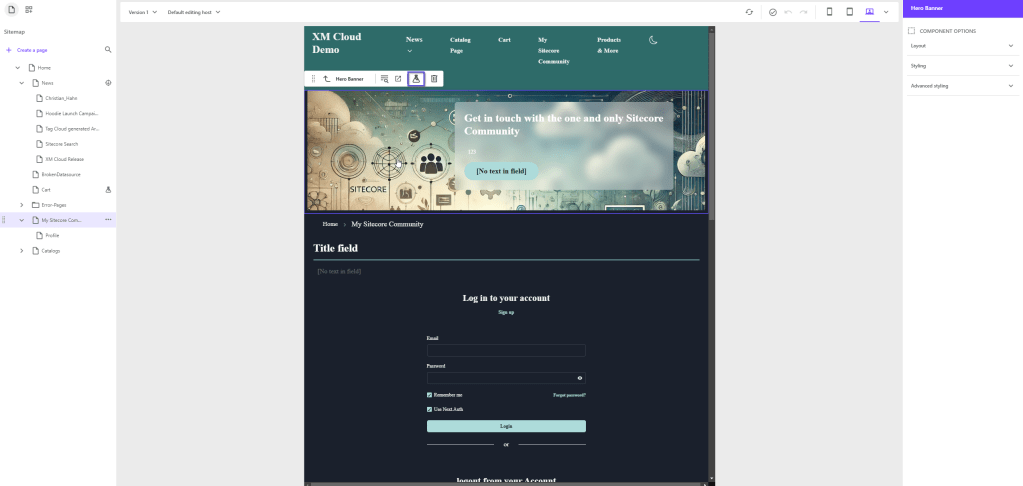
That’s our A/B/n testing icon and indicates you can now start your testing journey. Of course we click on this button, which leads us to the A/B/n Testing dialog and ultimately to the testing context menus.
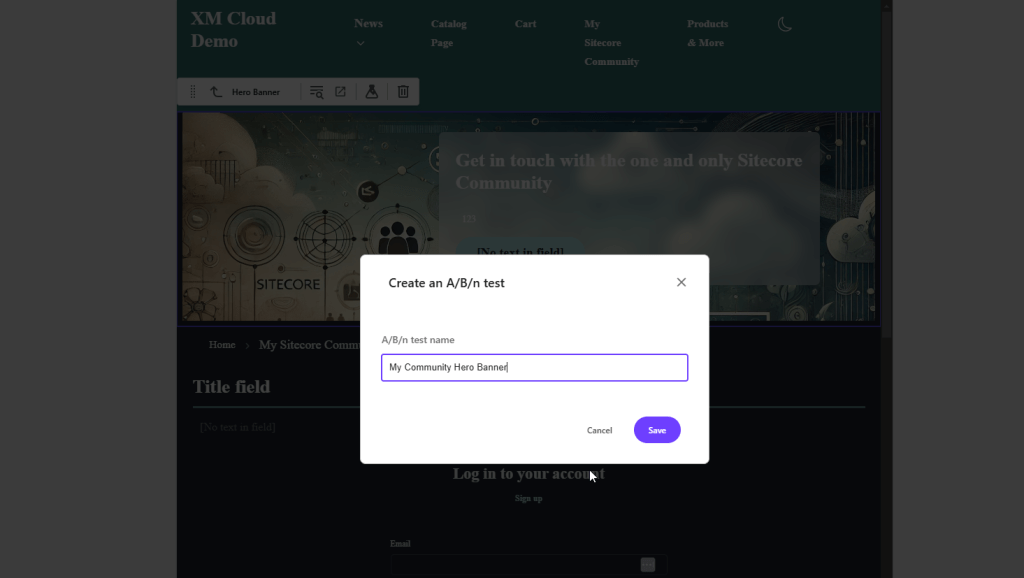
First we have to give the test a meaningful name.
Now actually two things happen
- Our page is marked with a little testing icon on the left-hand side (This is important as a page can either have a personalization or A/B/n tests running)
- A new context menu opens on the right-hand side, which guides us through the process to properly set up the test.
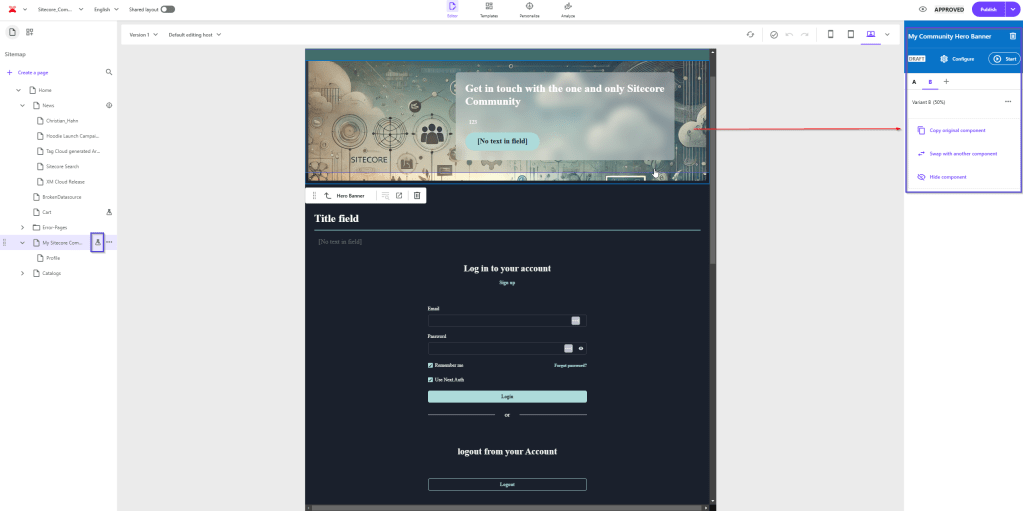
Having a closer look at this dialog now. Here we can
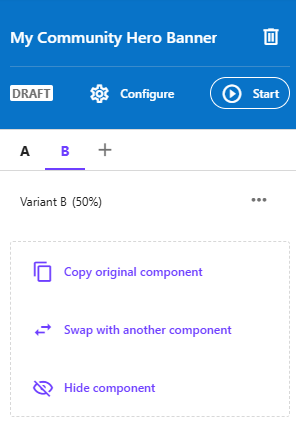
- Decide if the new variant should be copied from the original one (to be changed then), swapped with another component(this can be any component with its own Datasource), or if we simply hide the component
- Add more variants to our test like C, D etc. with the same options
- Do overall configurations of our test
Where 1 and 2 a pretty clear and obvious we will just have a closer look at the options of step 3.
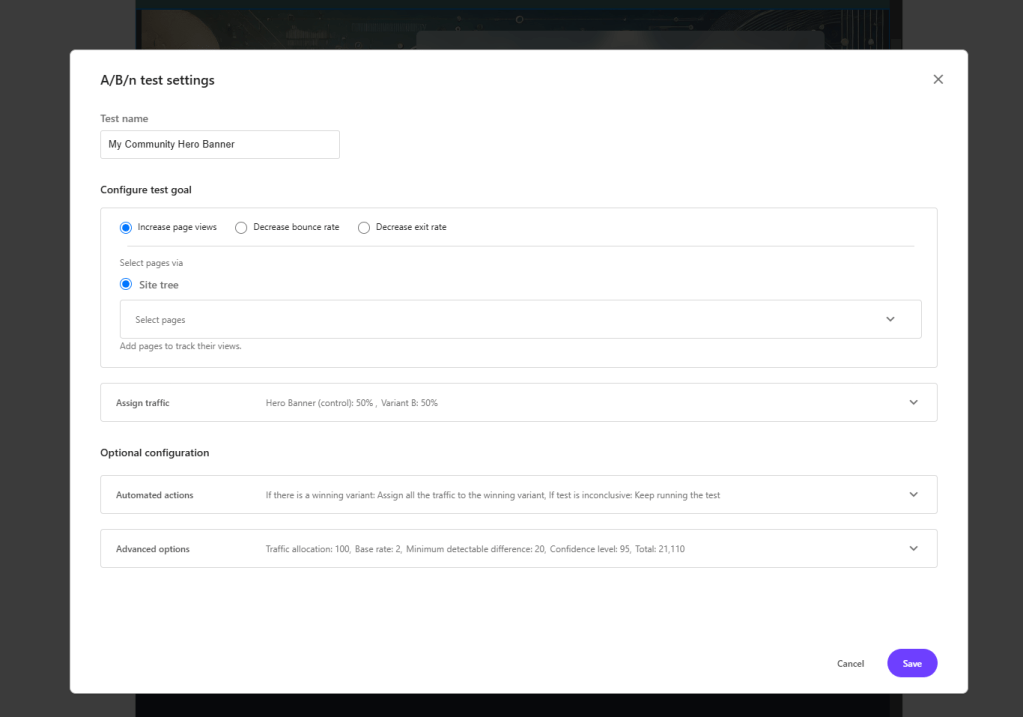
We have the possibility to set really general A/B/n testing stuff like a goal, which will be tracked in the background, the traffic split among all the variants and what should be done if a winner is automatically determined and more mathematical formulas on which bases the winner should be calculated. So we can do really granular settings in here.
Let us go back and assume I have created another variant of my hero banner and decided to copy the original Datasource to just add some new text and I decided to swap with another module.

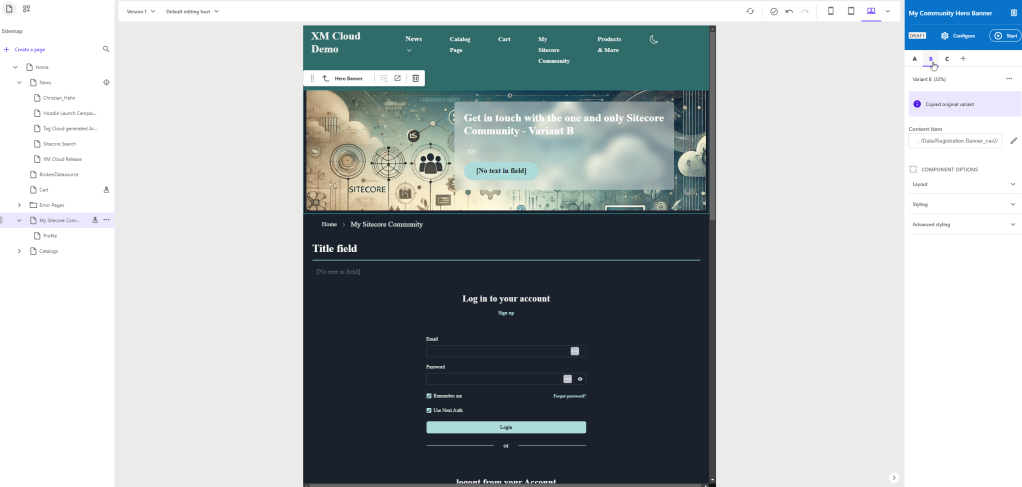

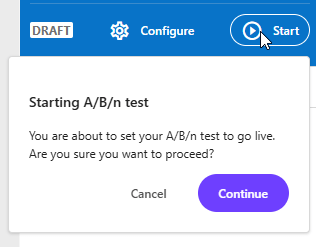
So we end up in a scenario like seen above. For this introduction and the later demo I am fine with this setup, so I start the test.
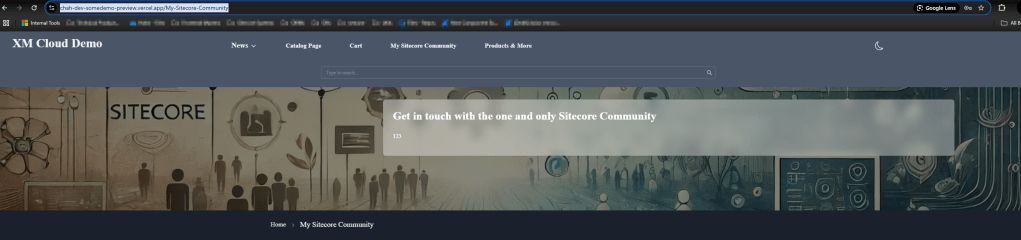
So if we now start browsing through the website we will start seeing different variants of the component being delivered to different users (based on session)
The A/B/n flow from a coding perspective
Let’s assume you already read my last post about personalization and how that works in XM Cloud on a coding level, there is literally no change in that :-D.
The only thing to keep in mind or better which basically changes is, that we potentially call personalize now several times. Why? Basic personalization works the way, that we get back all the variants (=Audiences) from Experience Edge and together with the current page ID (transformed a bit) and the variant Ids we ask Personalize, which one is active (if there is an active one). With A/B/n testing we still have one page id, but several more variant ids. Basically we have grouped variant Ids, grouped by component, where we added an A/B/n test on.
To better visualize that I will show now how this looks like in edge. And let us take the example from above as starting point

Compared to the personalization example the structure of the stored id has changed a bit. And this makes totally sense as we now save the information componentId_variantId and before it was just variantId among all components on a page.
But apart of that from a data point of view all behaves the same.
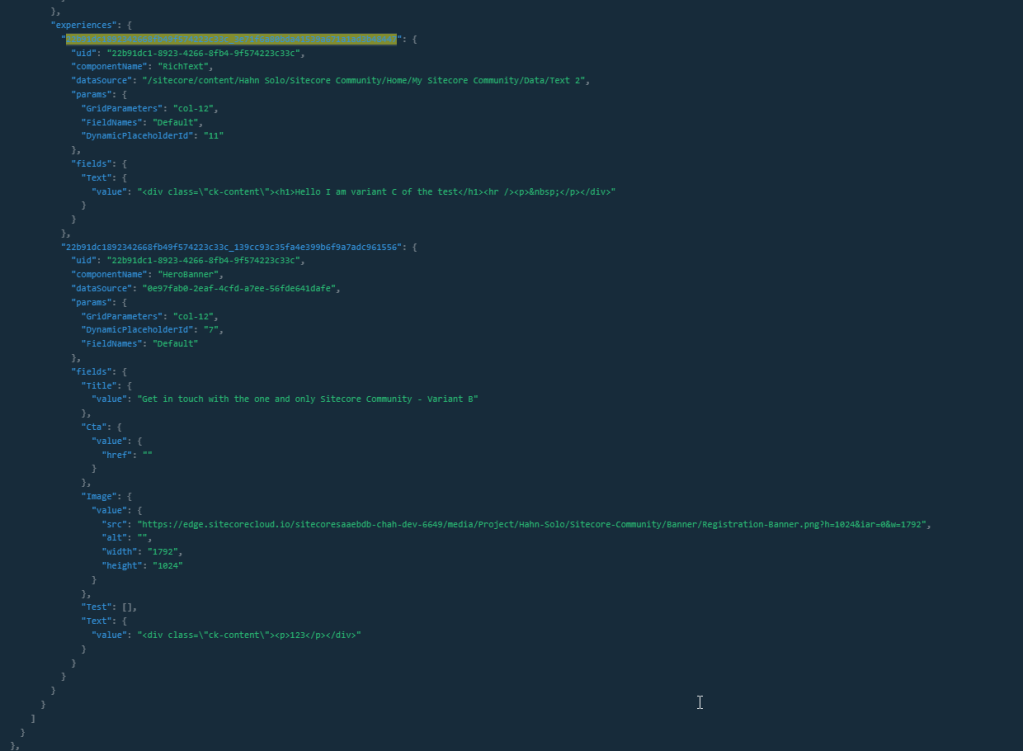
On the specific component level we have our experiences property with the matching key, so that our logic can easily run over all the components and do the replacement if needed.
From a code perspective there was literally no change needed, because all the needed code is already there. We just need to see the little differences 😉
For example there is code to get all the personalization executions before actually asking personalize. Exactly here we can examine some code, which is now taking place.
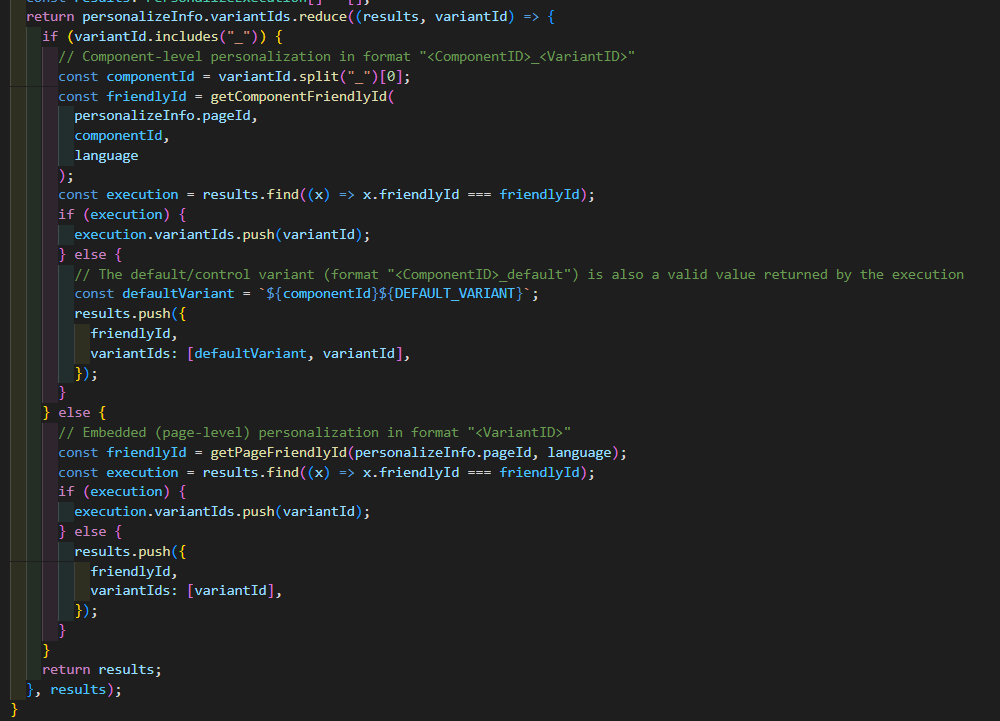
In personalize case we always went the else path cause there was no underscore in out Ids. But we earlier learned about the new structure and that in deed there is now an underscore splitting component from variant id of component. That way our already existing logic knows it has to ask personalize in a slightly different way.
Luckily I added some logging capability so we also see, what exactly that means.
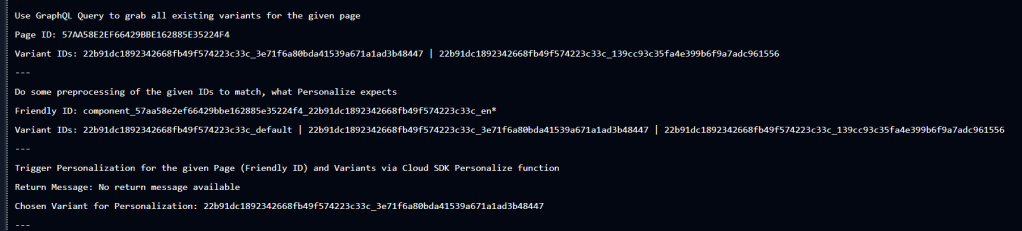
So based on the screen above we now ask personalize with a slightly modified friendly id containing the keyword component and some asterisk in the end. All the variant IDs of that specific component INCLUDING the manually created _default variant. With all of that Personalize simply answers, which variant of that component should be displayed from the given list, including the default one.
Now how does that look like on a page with more than one component, which has an A/B/n test. As you might expect it already, the number of variants starts increase a lot per component.
Here is an example with 2 components, each with 3 variants.

The underlying logic now, transforms those ids per component into the needed shape and ultimately executes PER COMPONENT a personalize call to determine which variant should be displayed.
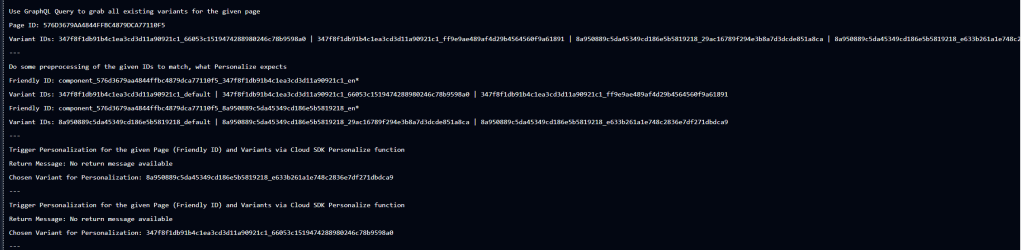
So from the log we can already nicely see that transformation and the duplication of the actual personalize call. In the end we get multiple variant IDs to apply back.
The rest, like the layout response transformation happens exactly the same way, just with multiple ids to check against.
Let us investigate in our Demo Application SEPTA -> SEPASA
First of all I had to change the name of my application as I now included A/B/n testing into it. Luckily I can easily change repository and app name as I totally own everything :-P.
Apart of that let us see how SEPASA reacts to pages, which have A/B/n testing rather than personalization active. My assumption was, it will work OOTB, cause as we already found out, it is basically the same.
And yes, it really worked immediately…
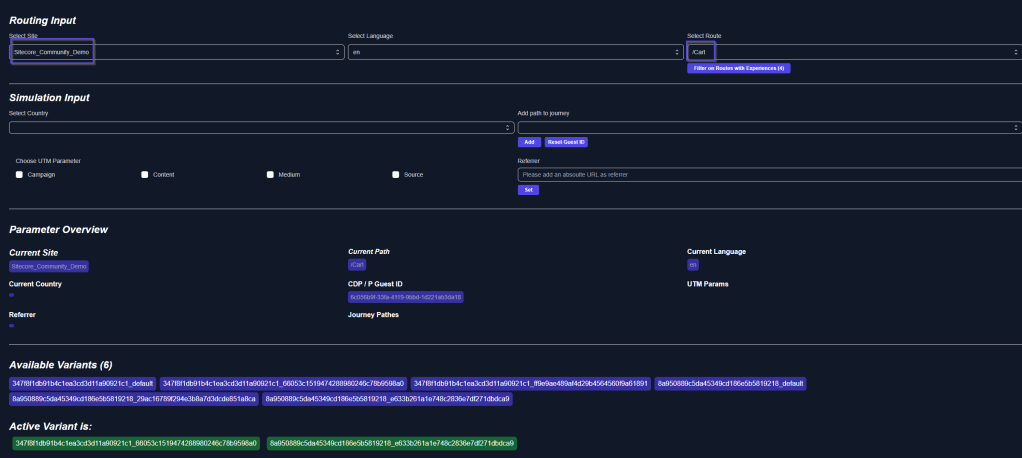
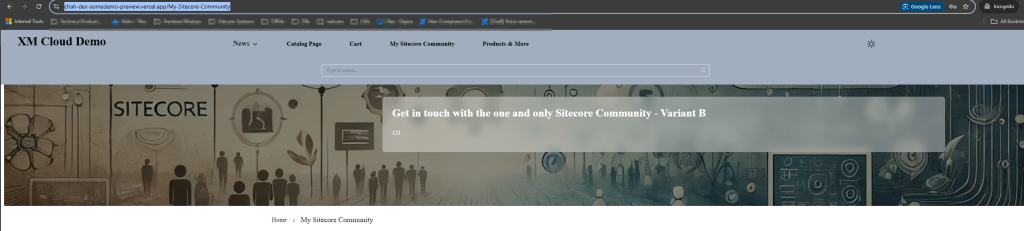
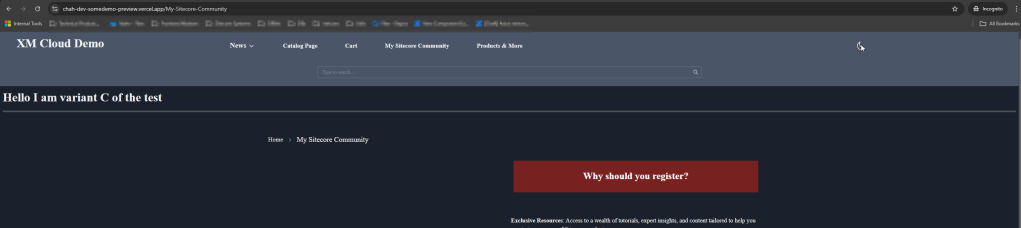
Choosing the cart page of my community demo results in a longer list of available variants as well two active ones. One per component.
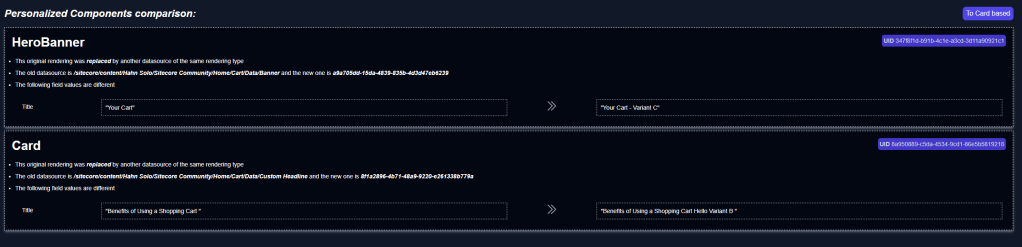
Based on the two active variants, we can also two changes happening on the page. So the first component is replaced with Variant B and the second with Variant C.
If we now reset our Guest ID, we would see, that the chosen set of variants most of the times changes randomly based on our set distribution among Variants per component.
A/B/n Testing live and in Action
Now let us also see everything live and in action. We will use the same website as before. This time (and thats also a little new function) we choose from our sites WITH experiences (Personalization OR A/B/n test) to be displayed. We choose our cart, where we have 2 tests running for the hero and a card module. We will see all the available variants (Those can be styled a bit more obvious – grouped by components) and the active ones. Further down we can drill down into all the available components with experiences as we also could do with personalizations. In the end we have the view on the applied experiences. In our case two components each with another variant cause they run individual tests, which we fully reflect.
Now we can also simulate the case of having different guests browsing the website and how the tests reacts on that. As you might remember we have chosen an even distribution of the traffic, so there should be more or less a random assignment per component. In the gif we just reset the gust id multiple times and we can see that the applied experiences are changing all the time between all the available variants.
Conclusion
Within this post you learned more about A/B/n testing in general and how Sitecore XM Cloud is actually doing this. All this from a Marketer but also more developer point of view. We saw, that basically and technically Personalization and A/B/n testing are the same functionality just with minor tweaks here and there with naming or having a list of active variants per component, rather than having just one variant (=audience) active. All this should give you now a solid understanding of how to apply Embedded Personalization AND A/B/n testing in your XM Cloud environment and if needed give you all you need to investigate how things are not working the way you would expect them to work
PS. I will make the repo public soon, so you can also spin up YOUR version of that app to play around with everything.
- architecture
- nextjs
- sitecore-platform
- xm-cloud